


Are You New to Web Development? Building a Website With Login and Registration Documents as PracticeIf you’re just getting into web development, developing a website complete with login and registration paperwork is an ideal way to assess and practice critical competencies such as creating navigation menu bars, developing homepage pages and writing login/registration documents.
I will walk you through creating a responsive website with login and registration forms using HTML, CSS, and JavaScript. By accomplishing this task, you’ll gain practical experience and learn essential web development principles such as DOM manipulation, event handling, conditional statements, etc.
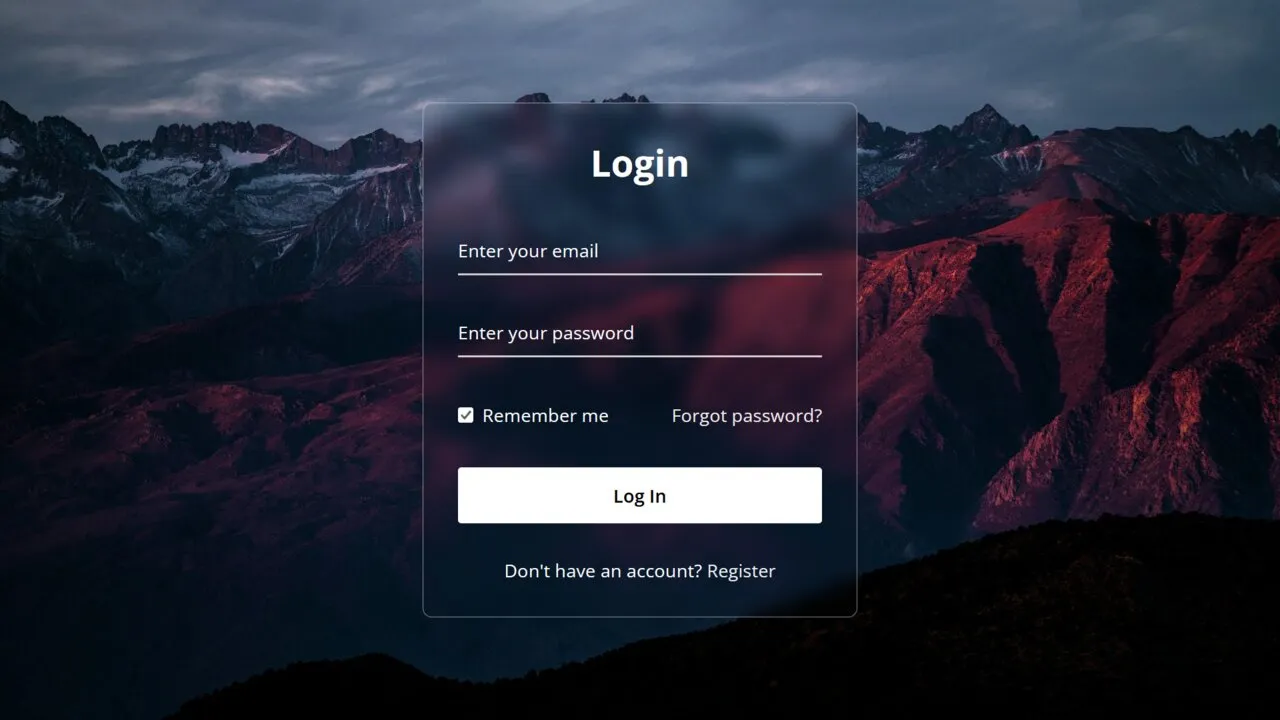
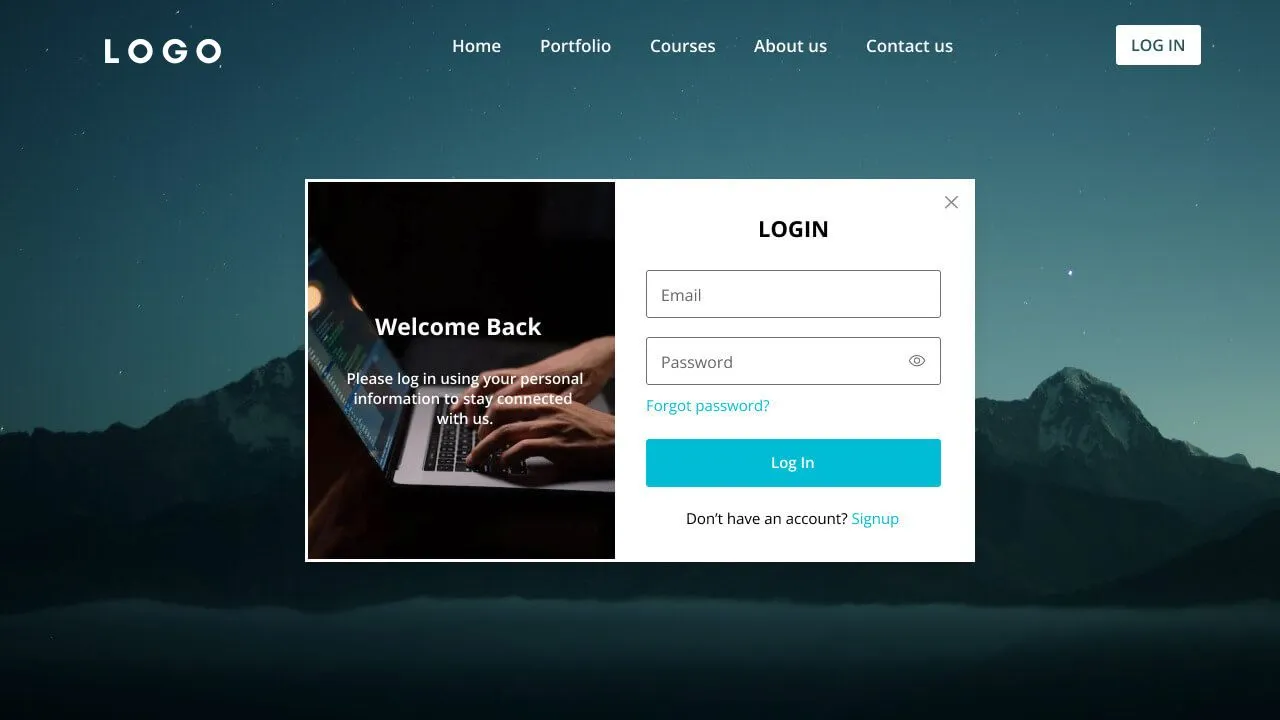
In this task, the website’s homepage features a navigation bar and login button; when clicked, it will reveal an attractive blurred background login form with a picture on the left and input fields on the right side. If you wish to join instead, click the sign-up link, which will take you directly to the registration form.
The navigation bar and documents on this website are fully responsive, which means they will adapt to fit any display size. On smaller displays, for instance, when clicking on a hamburger button to bring up navigation bars, they will appear from the right side, and forms will remain hidden when the left image section remains hidden.
The above YouTube video can be an excellent learning resource if you prefer learning through video tutorials. I have explained each line of code and provided helpful insights that make creating your website with login/registration processes accessible and user-friendly for beginners.
However, if you prefer reading blog posts or need a step-by-step guide, continue reading this publication. By the time it ends, you’ll have created your internet website with forms that are easy to customize and implement for various projects.
Steps for Establishing a Website with Login & Registration Form
Follow these step-by-step instructions to create a responsive internet website featuring login and registration forms with HTML, CSS, and vanilla JavaScript:
- First, create a folder with any name you like and store the necessary files.
- Create an index.Html report as the main document.
- Create a report called style.Css to hold onto CSS code.
- Create a document named script.Js to house your JavaScript code.
- Download and add the Images folder to your project listing. This folder contains all of the images needed for this undertaking.
Start by uploading the following HTML codes to your index.Html file: header, nav, ul, form, and any extra elements needed for the project.
<!DOCTYPE html>
<html lang="en">
<head>
    <meta charset="UTF-8">
    <meta name="viewport" content="width=device-width, initial-scale=1.0">
    <title>Website with Login and Registration Form</title>
    <!-- Google Fonts Link For Icons -->
    <link rel="stylesheet" href="https://fonts.googleapis.com/css2?family=Material+Symbols+Rounded:opsz,wght,FILL,GRAD@48,400,0,0">
    <link rel="stylesheet" href="style.css">
    <script src="script.js" defer></script>
</head>
<body>
    <header>
        <nav>
            <span>menu</span>
            <a href="#">
                <img src="images/logo.jpg" alt="logo">
                <h2>CodingNepal</h2>
            </a>
            <ul>
                <span>close</span>
                <li><a href="#">Home</a></li>
                <li><a href="#">Portfolio</a></li>
                <li><a href="#">Courses</a></li>
                <li><a href="#">About us</a></li>
                <li><a href="#">Contact us</a></li>
            </ul>
            <button>LOG IN</button>
        </nav>
    </header>
    <div></div>
    <div>
        <span>close</span>
        <div>
            <div>
                <h2>Welcome Back</h2>
                <p>Please log in using your personal information to stay connected with us.</p>
            </div>
            <div>
                <h2>LOGIN</h2>
                <form action="#">
                    <div>
                        <input type="text" required>
                        <label>Email</label>
                    </div>
                    <div>
                        <input type="password" required>
                        <label>Password</label>
                    </div>
                    <a href="#">Forgot password?</a>
                    <button type="submit">Log In</button>
                </form>
                <div>
                    Don't have an account?
                    <a href="#" id="signup-link">Signup</a>
                </div>
            </div>
        </div>
        <div>
            <div>
                <h2>Create Account</h2>
                <p>To become a part of our community, please sign up using your personal information.</p>
            </div>
            <div>
                <h2>SIGNUP</h2>
                <form action="#">
                    <div>
                        <input type="text" required>
                        <label>Enter your email</label>
                    </div>
                    <div>
                        <input type="password" required>
                        <label>Create password</label>
                    </div>
                    <div>
                        <input type="checkbox" id="policy">
                        <label for="policy">
                            I agree the
                            <a href="#">Terms & Conditions</a>
                        </label>
                    </div>
                    <button type="submit">Sign Up</button>
                </form>
                <div>
                    Already have an account?
                    <a href="#" id="login-link">Login</a>
                </div>
            </div>
        </div>
    </div>
</body>
</html>
Add these CSS codes to your style.css document for visual styling on your website and documents. Experiment with various CSS properties, such as colours, fonts, and backgrounds, for a truly customized feel on your site.
/* Importing Google font - Open Sans */
@import url("https://fonts.googleapis.com/css2?family=Open+Sans:wght@400;500;600;700&display=swap");
* {
    margin: 0;
    padding: 0;
    box-sizing: border-box;
    font-family: "Open Sans", sans-serif;
}
body {
    height: 100vh;
    width: 100%;
    background: url("images/hero-bg.jpg") center/cover no-repeat;
}
header {
    position: fixed;
    width: 100%;
    top: 0;
    left: 0;
    z-index: 10;
    padding: 0 10px;
}
.navbar {
    display: flex;
    padding: 22px 0;
    align-items: center;
    max-width: 1200px;
    margin: 0 auto;
    justify-content: space-between;
}
.navbar .hamburger-btn {
    display: none;
    color: #fff;
    cursor: pointer;
    font-size: 1.5rem;
}
.navbar .logo {
    gap: 10px;
    display: flex;
    align-items: center;
    text-decoration: none;
}
.navbar .logo img {
    width: 40px;
    border-radius: 50%;
}
.navbar .logo h2 {
    color: #fff;
    font-weight: 600;
    font-size: 1.7rem;
}
.navbar .links {
    display: flex;
    gap: 35px;
    list-style: none;
    align-items: center;
}
.navbar .close-btn {
    position: absolute;
    right: 20px;
    top: 20px;
    display: none;
    color: #000;
    cursor: pointer;
}
.navbar .links a {
    color: #fff;
    font-size: 1.1rem;
    font-weight: 500;
    text-decoration: none;
    transition: 0.1s ease;
}
.navbar .links a:hover {
    color: #19e8ff;
}
.navbar .login-btn {
    border: none;
    outline: none;
    background: #fff;
    color: #275360;
    font-size: 1rem;
    font-weight: 600;
    padding: 10px 18px;
    border-radius: 3px;
    cursor: pointer;
    transition: 0.15s ease;
}
.navbar .login-btn:hover {
    background: #ddd;
}
.form-popup {
    position: fixed;
    top: 50%;
    left: 50%;
    z-index: 10;
    width: 100%;
    opacity: 0;
    pointer-events: none;
    max-width: 720px;
    background: #fff;
    border: 2px solid #fff;
    transform: translate(-50%, -70%);
}
.show-popup .form-popup {
    opacity: 1;
    pointer-events: auto;
    transform: translate(-50%, -50%);
    transition: transform 0.3s ease, opacity 0.1s;
}
.form-popup .close-btn {
    position: absolute;
    top: 12px;
    right: 12px;
    color: #878484;
    cursor: pointer;
}
.blur-bg-overlay {
    position: fixed;
    top: 0;
    left: 0;
    z-index: 10;
    height: 100%;
    width: 100%;
    opacity: 0;
    pointer-events: none;
    backdrop-filter: blur(5px);
    -webkit-backdrop-filter: blur(5px);
    transition: 0.1s ease;
}
.show-popup .blur-bg-overlay {
    opacity: 1;
    pointer-events: auto;
}
.form-popup .form-box {
    display: flex;
}
.form-box .form-details {
    width: 100%;
    color: #fff;
    max-width: 330px;
    text-align: center;
    display: flex;
    flex-direction: column;
    justify-content: center;
    align-items: center;
}
.login .form-details {
    padding: 0 40px;
    background: url("images/login-img.jpg");
    background-position: center;
    background-size: cover;
}
.signup .form-details {
    padding: 0 20px;
    background: url("images/signup-img.jpg");
    background-position: center;
    background-size: cover;
}
.form-box .form-content {
    width: 100%;
    padding: 35px;
}
.form-box h2 {
    text-align: center;
    margin-bottom: 29px;
}
form .input-field {
    position: relative;
    height: 50px;
    width: 100%;
    margin-top: 20px;
}
.input-field input {
    height: 100%;
    width: 100%;
    background: none;
    outline: none;
    font-size: 0.95rem;
    padding: 0 15px;
    border: 1px solid #717171;
    border-radius: 3px;
}
.input-field input:focus {
    border: 1px solid #00bcd4;
}
.input-field label {
    position: absolute;
    top: 50%;
    left: 15px;
    transform: translateY(-50%);
    color: #4a4646;
    pointer-events: none;
    transition: 0.2s ease;
}
.input-field input:is(:focus, :valid) {
    padding: 16px 15px 0;
}
.input-field input:is(:focus, :valid)~label {
    transform: translateY(-120%);
    color: #00bcd4;
    font-size: 0.75rem;
}
.form-box a {
    color: #00bcd4;
    text-decoration: none;
}
.form-box a:hover {
    text-decoration: underline;
}
form :where(.forgot-pass-link, .policy-text) {
    display: inline-flex;
    margin-top: 13px;
    font-size: 0.95rem;
}
form button {
    width: 100%;
    color: #fff;
    border: none;
    outline: none;
    padding: 14px 0;
    font-size: 1rem;
    font-weight: 500;
    border-radius: 3px;
    cursor: pointer;
    margin: 25px 0;
    background: #00bcd4;
    transition: 0.2s ease;
}
form button:hover {
    background: #0097a7;
}
.form-content .bottom-link {
    text-align: center;
}
.form-popup .signup,
.form-popup.show-signup .login {
    display: none;
}
.form-popup.show-signup .signup {
    display: flex;
}
.signup .policy-text {
    display: flex;
    margin-top: 14px;
    align-items: center;
}
.signup .policy-text input {
    width: 14px;
    height: 14px;
    margin-right: 7px;
}
@media (max-width: 950px) {
    .navbar :is(.hamburger-btn, .close-btn) {
        display: block;
    }
    .navbar {
        padding: 15px 0;
    }
    .navbar .logo img {
        display: none;
    }
    .navbar .logo h2 {
        font-size: 1.4rem;
    }
    .navbar .links {
        position: fixed;
        top: 0;
        z-index: 10;
        left: -100%;
        display: block;
        height: 100vh;
        width: 100%;
        padding-top: 60px;
        text-align: center;
        background: #fff;
        transition: 0.2s ease;
    }
    .navbar .links.show-menu {
        left: 0;
    }
    .navbar .links a {
        display: inline-flex;
        margin: 20px 0;
        font-size: 1.2rem;
        color: #000;
    }
    .navbar .links a:hover {
        color: #00BCD4;
    }
    .navbar .login-btn {
        font-size: 0.9rem;
        padding: 7px 10px;
    }
}
@media (max-width: 760px) {
    .form-popup {
        width: 95%;
    }
    .form-box .form-details {
        display: none;
    }
    .form-box .form-content {
        padding: 30px 20px;
    }
}
Once the patterns have been applied, load the website in your browser to view your creation. While the forms may be hidden, they will become visible in JavaScript later. At present, only its navigation bar and hero image will be visible.
Add the following JavaScript code into your script.Js file: It includes click event listeners, allowing classes to be toggled on various HTML points. Although it’s easy to understand, it may help to watch the above video tutorial and review code feedback before performing experiments.
const navbarMenu = document.querySelector(".navbar .links");
const hamburgerBtn = document.querySelector(".hamburger-btn");
const hideMenuBtn = navbarMenu.querySelector(".close-btn");
const showPopupBtn = document.querySelector(".login-btn");
const formPopup = document.querySelector(".form-popup");
const hidePopupBtn = formPopup.querySelector(".close-btn");
const signupLoginLink = formPopup.querySelectorAll(".bottom-link a");
// Show mobile menu
hamburgerBtn.addEventListener("click", () => {
    navbarMenu.classList.toggle("show-menu");
});
// Hide mobile menu
hideMenuBtn.addEventListener("click", () =>  hamburgerBtn.click());
// Show login popup
showPopupBtn.addEventListener("click", () => {
    document.body.classList.toggle("show-popup");
});
// Hide login popup
hidePopupBtn.addEventListener("click", () => showPopupBtn.click());
// Show or hide signup form
signupLoginLink.forEach(link => {
    link.addEventListener("click", (e) => {
        e.preventDefault();
        formPopup.classList[link.id === 'signup-link' ? 'add' : 'remove']("show-signup");
    });
});
Conclusion and Final Phrases.
Making a website’s homepage with paperwork is an engaging, hands-on learning experience for exploring various website components and general web development principles. By following the steps outlined in this blog post, I believe you have successfully created your own login/registration website using HTML, CSS, and JavaScript technologies.
As part of your efforts to further your web development skills, recreating some of the websites and login form projects offered on this website will give you a deeper understanding of how HTML, CSS and JavaScript work together to produce distinctive website elements.
If you encounter difficulties building your website with forms, you can download the source code files free of charge by clicking the Download button and viewing a live demo by pressing View Live.
Brilliant explanation! I’ve been searching for a comprehensive tutorial on form validation, and this is by far the best I’ve found. Thank you for sharing your expertise!
Great tutorial! I appreciate how you covered the basics as well as more advanced techniques. Form validation is such an important aspect of web design, and now I feel equipped to handle it effectively.
Wow, this tutorial is exactly what I needed. I was always intimidated by JavaScript, but your explanations made it much more approachable. Now I can create robust forms with confidence!
Thank you for sharing this tutorial! I’ve been struggling with form validation for a while, but your guidance made it much simpler. Can’t wait to apply this knowledge to my website.
Excellent tutorial! Clear explanations and practical examples made it easy to follow along. Form validation used to be a headache, but now I feel confident implementing it in my projects.
This tutorial was a lifesaver! Finally, I understand how to implement form validation seamlessly across HTML, CSS, and JavaScript. Thanks for breaking it down step by step!